Getting Started
Introduction
Aiseesoft Video Enhancer is professional video enhancement software. It enables you to enhance video quality, rotate and flip video and edit/crop/clip/watermark video. In the following tutorial, you will get to know how to use Aiseesoft Video Enhancer to enhance video quality.
How to Enhance Video
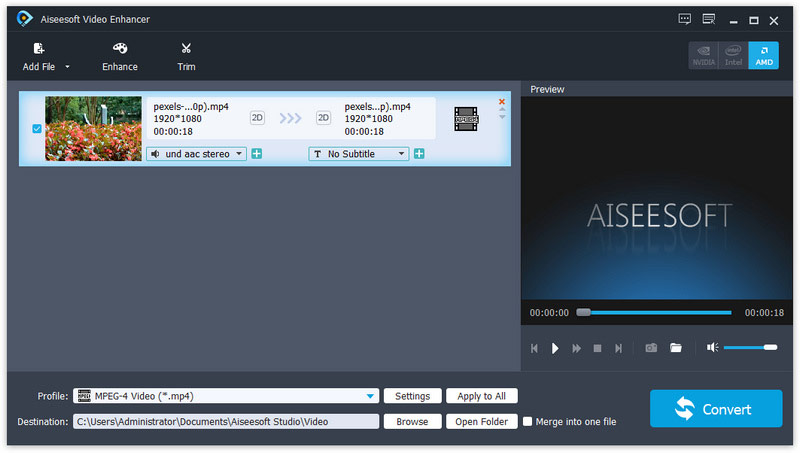
Step 1 Open Aiseesoft Video Enhancer on computer and add the files to change effect.
Download and install the software. Find Add Files on the top left of the interface. Press it and add the video files to enhance the quality.
Step 2 Enhance
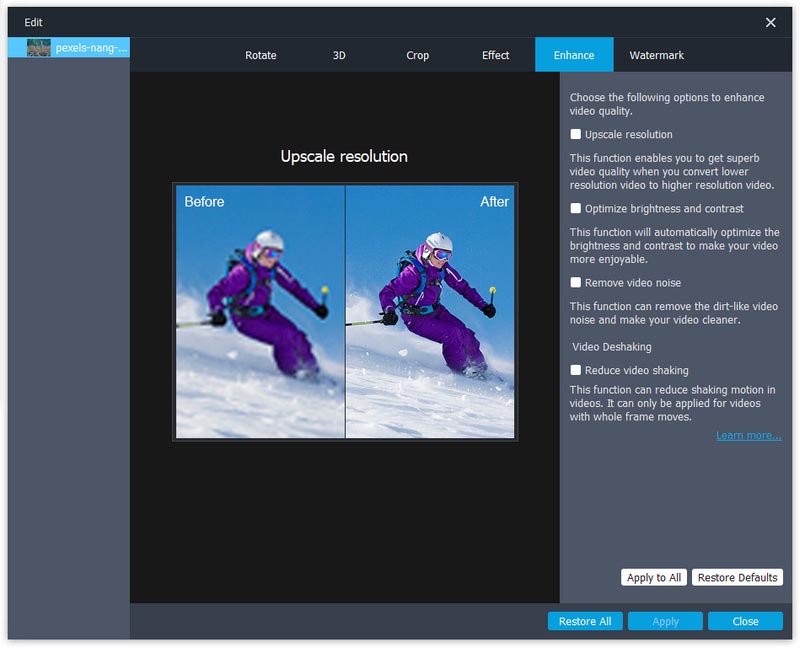
There are three options to enhance the video. You can upscale resolution, optimize brightness and contrast and remove video noise by selecting these options. We recommend you to enable all three options here.
Step 3 Rotate and flip
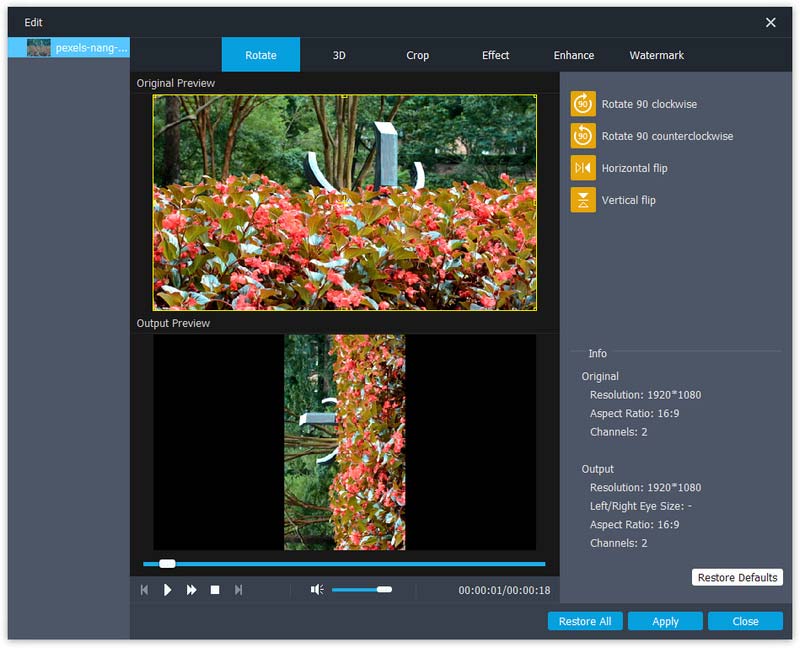
You can rotate the video 90 clockwise and 90 counterclockwise. Or you can make the video horizontal flip or vertical flip. The interface also enables you to compare the effect before and after rotate or flip.
Step 4 Edit
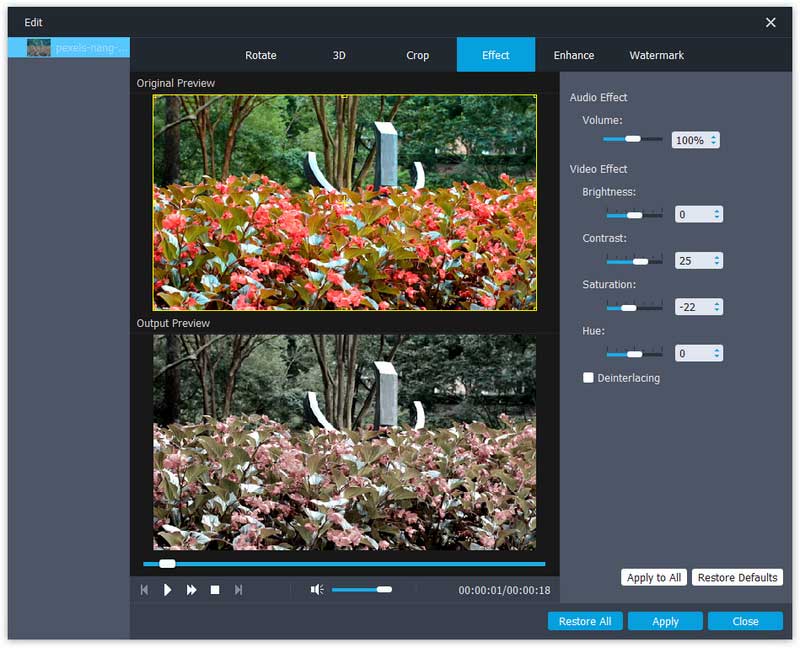
Notice to change video effect here by adjusting brightness, contrast, saturation and hue. You can also change the original volume of the video.
Step 5 Crop and watermark
Crop the video area here. If there is black frame in your video, cut it off using this function.
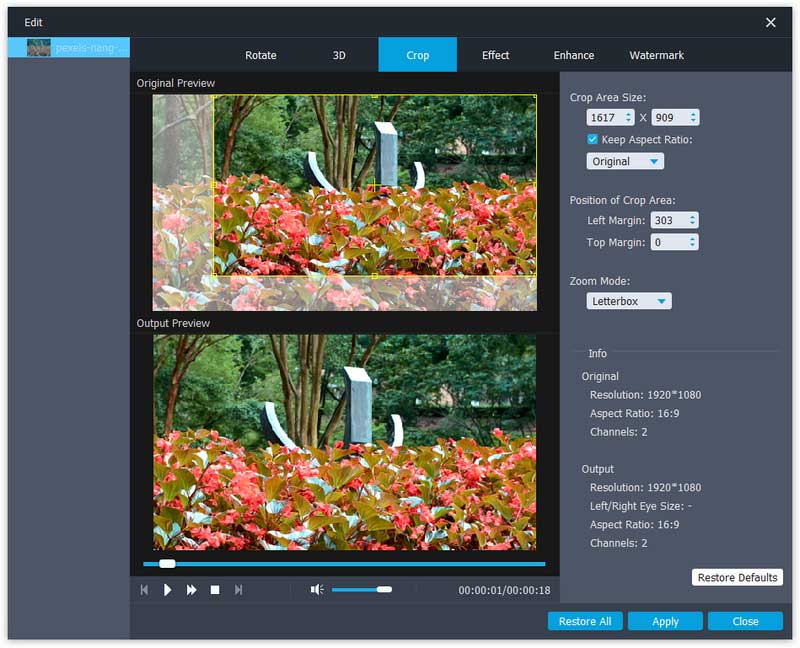
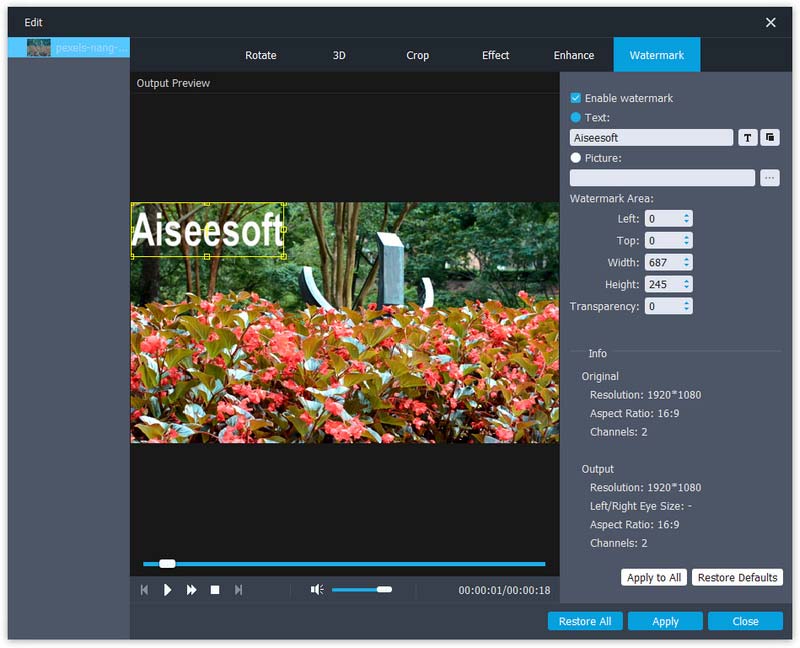
Click the Watermark tab, press Enable watermark, you will find you can add text or picture now. Input text, and change text effect by clicking the T button next to it.
Step 6 Clip
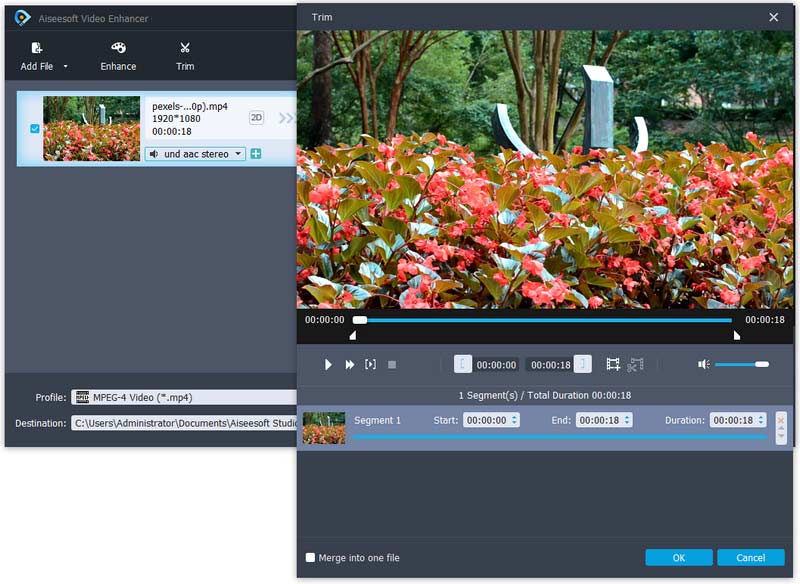
Find the Clip button on the top part of the software, click it, and then move the following icon to adjust video duration. Press OK to make video clips.
Step 7 Select destination and output formats
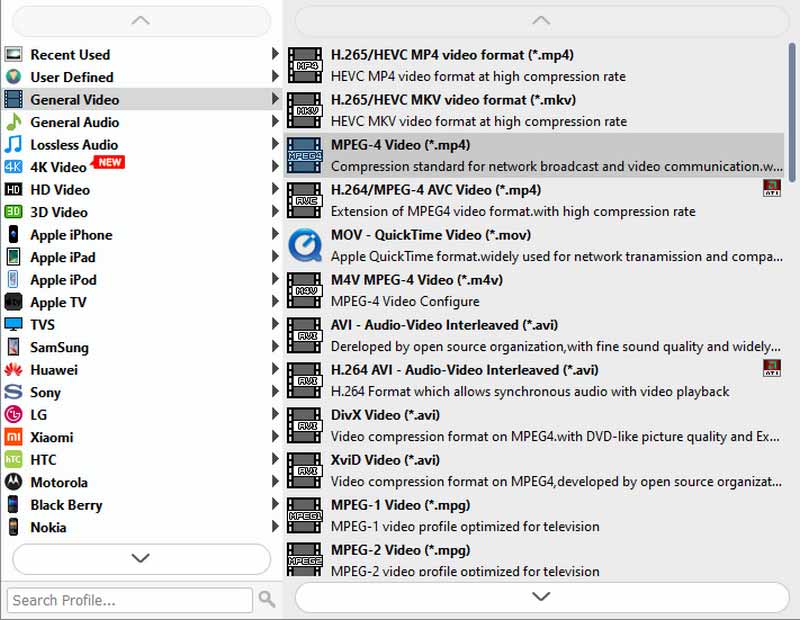
Find profile in the bottom part of the software, press it and then choose the output video formats. Click the Destination button to find output destination. Then press Convert to make video with enhanced effects.
-
How to Enhance Video Quality
Read this article to enhance video quality.
 Posted by Jenny Ryan | 08.03.2016
 -
How to Remove Video Noise
If you want to remove video noise, you can check this article.
 Posted by Jenny Ryan | 01.03.2021
 -
How to Optimize Brightness and Contrast
Follow this article to optimize video brightness and contrast.
 Posted by Jenny Ryan | 08.03.2016
 -
How to Make Videos be HD Videos
Now, you can make your videos be HD videos.
 Posted by Jenny Ryan | 08.03.2016
 -
How to Turn Videos to be 4K Videos
If you want to get a 4K video from a normal video, you can read this article.
 Posted by Jenny Ryan | 08.03.2016
 -
How to Rotate Video on iPhone
Learn how to rotate video on iPhone
 Posted by Jenny Ryan | 14.03.2014
 -
How to Flip a Video
Now, you have the chance to flip videos easily.
 Posted by Jenny Ryan | 07.11.2012
 -
5 Best Free MP4 Splitter for Windows and Mac
You can find 5 best free MP4 splitter for Windows and Mac to split MP4 video.
 Posted by Jenny Ryan | 10.10.2017
 -
How to Edit MTS Video without iMovie
Now, you need to know how to edit MTS video without iMovie.
 Posted by Jenny Ryan | 17.07.2017
 -
How to Edit XAVC in Avid
Read this article to put and edit XAVC video in Avid.
 Posted by Jenny Ryan | 07.11.2012
 -
How to Edit XAVC on Computer
If you want to edit XAVC videos on computer, just read it.
 Posted by Jenny Ryan | 07.11.2012
 -
How to Edit DVD Menu easily and quickly
Now find the best way to edit DVD menus.
 Posted by Jenny Ryan | 14.06.2014
 -
Edit Videos before Converting to DVD
If you want to edit videos before burning to DVD, follow it.
 Posted by Jenny Ryan | 19.07.2014
 -
5 Easy Ways to Combine VOB Files You Should Know
How to combine VOB files on Windows or Mac computer? This article shows you how to combine/merge/join VOB files into a single file without quality loss.
 Posted by Ashley Mae | 14.12.2020
 -
How can You Edit MP4 Videos
Get more tips about editing MP4 videos.
 Posted by Jenny Ryan | 20.07.2017
 -
Rotate Video on Computer
If you want to rotate videos on Mac or PC, you can read this article.
 Posted by Jenny Ryan | 07.11.2012
 -
Top 10 Android Video Editing Software
Follow this article to check best Android video editors.
 Posted by Jenny Ryan | 21.10.2016
 -
Top 10+ Free Video Editor on Windows
Now, just follow this guide to get free video editors on Windows.
 Posted by Jenny Ryan | 20.10.2016
 -
Free Video Editors on Mac
Read this article to get free video editors on Mac.
 Posted by Jenny Ryan | 20.10.2016
 -
Best Video Editing Apps on iOS
Now, just find best video editing apps for iPhone and iPad.
 Posted by Jenny Ryan | 20.10.2016
 -
Find iMovie for Android
If you want to edit video with iMovie on Android, just find its alternatives.
 Posted by Jenny Ryan | 20.10.2016
 -
Top 6 Audio Joiners
Read this article to find best audio joiner.
 Posted by Jenny Ryan | 20.10.2016
 -
Free Photo Editing Software
Know more free photo editing programs on Mac/PC/Android/iPhone
 Posted by Jenny Ryan | 20.10.2016
 -
How to Edit MP3 Files
Now, learn how to edit MP3 files easily.
 Posted by Jenny Ryan | 20.10.2016
 -
Find Video Combiners to Merge Videos
If you want to merge videos, just find video merger to finish this.
 Posted by Jenny Ryan | 20.10.2016
 -
Find Alternatives for Final Cut Pro on Windows
Now, edit video with Final Cut Pro for Windows.
 Posted by Jenny Ryan | 09.01.2015
 -
Best 4K Editors for Mac and Windows
Read this article to find best 4K editors for Mac and Windows.
 Posted by Jenny Ryan | 29.04.2015
 -
There are More MP4 Editors
Read this article to find more MP4 editors.
 Posted by Jenny Ryan | 21.10.2016
 -
5 Best GoPro Editors
Now, you can get top 5 GoPro editing software.
 Posted by Jenny Ryan | 14.03.2014
 -
Sony Video Editing Software
Get more information to edit Sony video with video editor.
 Posted by Jenny Ryan | 07.11.2012
 -
Best video editing Software for Mac and Windows
Now, you can get best video editors for Mac and Windows.
 Posted by Jenny Ryan | 20.05.2016

