There are thousands of folders and files on your Mac. Apparently, it is clear to see a lot of files on your desktop and local disks. However, your Mac has a little secret. You may not know that there are thousands of hidden files or secret folders on your Mac.
Some of the hidden files and folders are important that you cannot disturb or edit. These hidden files prevent you from accidentally deleting or changing. If you delete one important file, it may cause problem to your operation system. There may be cases such as your system gets wrong, so you need to find the certain hidden files.
Sometimes there may be some problems with your apps, so you may find a preference file or a log file to help you fix this problem. In addition, some hidden files take too much space on your Mac, so you need to delete some of them as to save your important disk space.
So how to make these hidden files become visible? Have you ever thought of checking these files out? Here, we'd like to show you 3 methods to access and show hidden folders on your computer.

Well, before learning about how to see hidden files on Mac, the first thing you should know that what hidden files are.
Hidden files are usually preceded by a period. They may show up like a .htaccess file, a .bash file, or a .svn folder. Most users want to view the Library folder. ~/Library folder is also a hidden folder where some secret files of Mac applications are saved here.
Finder keyboard shortcuts can be the easiest and quickest way to see the hidden files and folders including Library folder in macOS Sierra.
Step 1First, you should open Mac Finder.
Step 2Click "Go" on the top-left row of menu items, select "Computer".
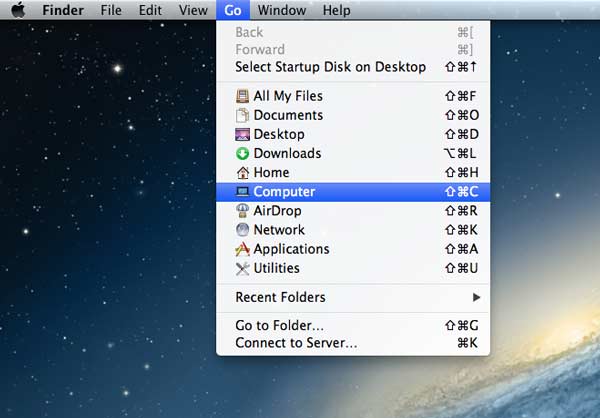
Step 3Double-click "Macintosh HD". Finally, press the keyboard shortcuts "Command + Shift + Period". Then the hidden folders will be visible, shown as grayed-out.

Note: If you want to hide the hidden files, you may press the key combination "Command + Shift + Period" again.
Or you have another alternative to view your ~/Library folder.
First, you should open Finder. Press down Alt/Option and click "Go" at the same time. You will see the ~/Library folder listed below the Home folder.
However, remember not to move, delete, or edit these files, because many configuration files in macOS Sierra are essential to functions of your Mac.
You can also open Terminal command-line interface to check the hidden files on your Mac. Terminal is proceeded in the macOS operation system, which provides command line interface to Mac operating system when used in conjunction with a Unix shell.
Using Terminal is much easier. You just type text on the command and press Enter/return to execute it. However, one character even a space in a command is essential. So you need to copy the right text to make sure the right command.
Step 1Firstly, you should open Finder, click Go, and select Utilities.
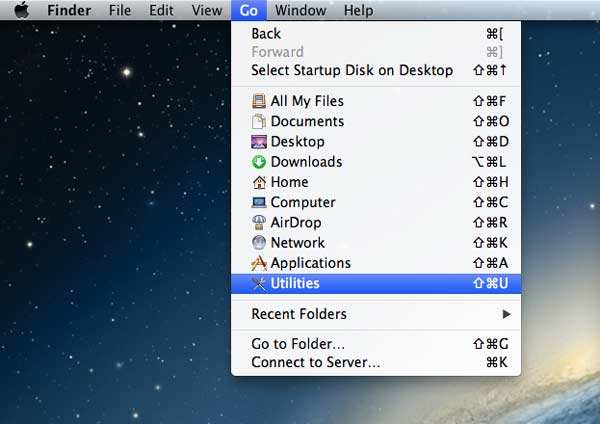
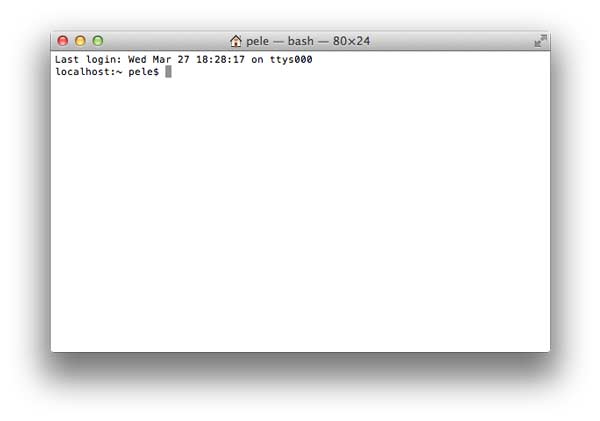
Step 2Find Terminal icon in Utilities folder, and double-click Terminal. Then a prompt will show on the interface.
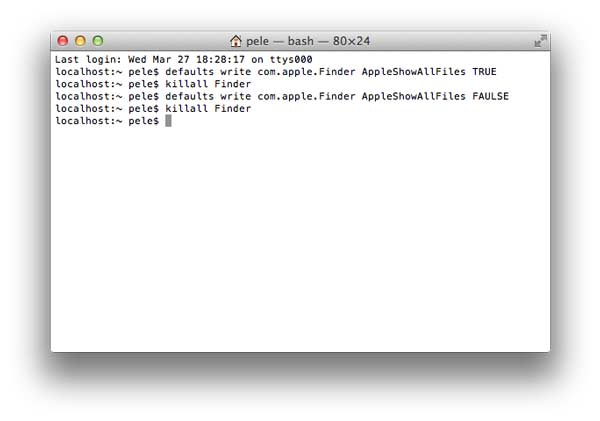
Step 3You are allowed to enter commands by typing on your keyboard. You should enter: defaults write com.apple.Finder AppleShowAllFiles TRUE and press Enter/return key on the keyboard.

Step 4Type killall Finder and press Enter/return key. And the hidden files will be shown in translucent. You should notice that "F" in "Finder" and "Files" should be capitalized or these commands will be invalid.
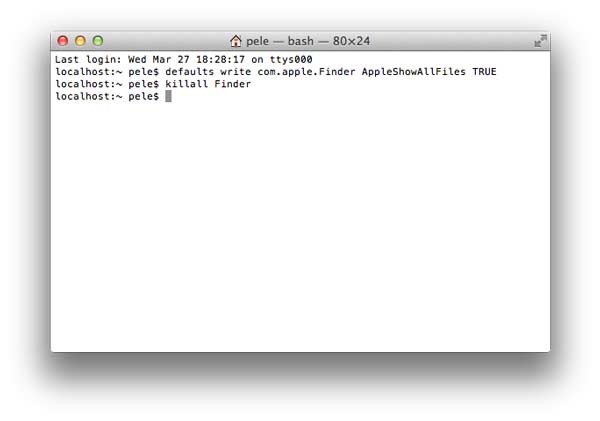
After all these commands done, you can close Terminal Utility. Then you can check all the files including hidden files on your Mac.
Note: If you'd like to make these hidden files invisible again, you can follow the same step to start Terminal. Then, you should enter defaults write com.apple.Finder AppleShowAllFiles FALSE on your keyboard, and press Enter/return key. Finally, you should enter killall Finder and press Enter/return key. Or you can continue to type the command in the same prompt.
If you want to manage your hidden files, you may try Aiseesoft Mac Data Recovery on your Mac OS X EL Captain. Mac Data Recovery enables you to recover deleted or lost files from crashed software on your Mac. Plus, you are also allowed to preview your hidden files on Mac.
Features:
Step 1Download Aiseesoft Data Recovery for Mac. After downloading, install and launch this program on your computer.
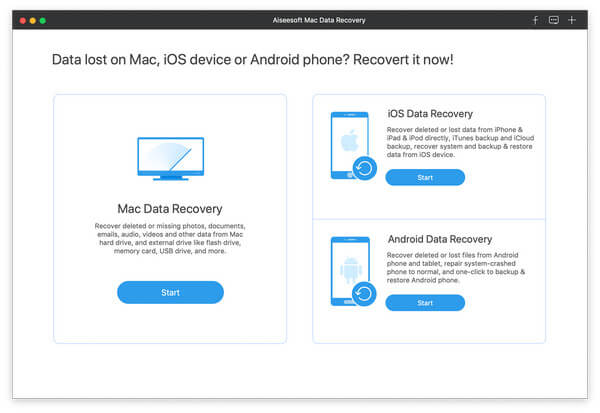
Note: For Mac running Mac OS X El Capitan or later, you need to disable System Integrity Protection firstly for using Data Recovery on your Mac. Check the details here: How to disable System Integrity Protection.
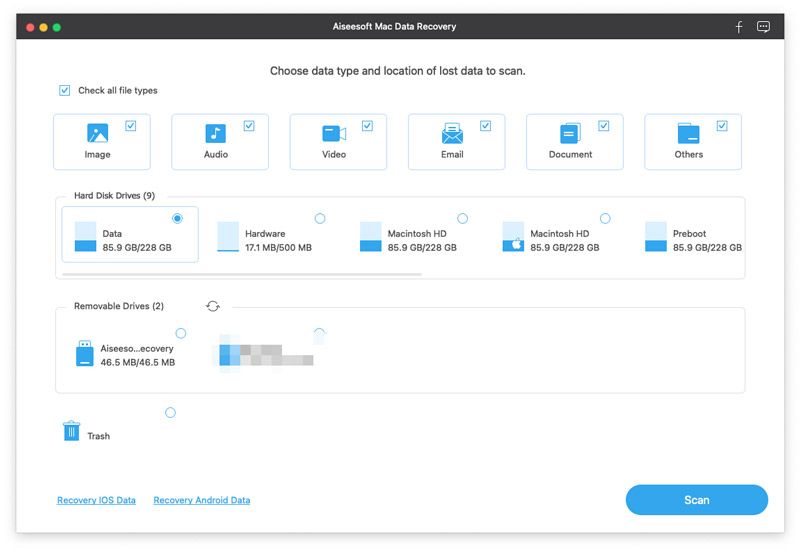
Step 2You can choose data type and disk drive for scanning in the main interface. You are able to scan images, audio, video, email, documents and other data.
You can also scan external drive from your Mac, like flash card, camera card, and more. Then, click "Scan" to start scanning.
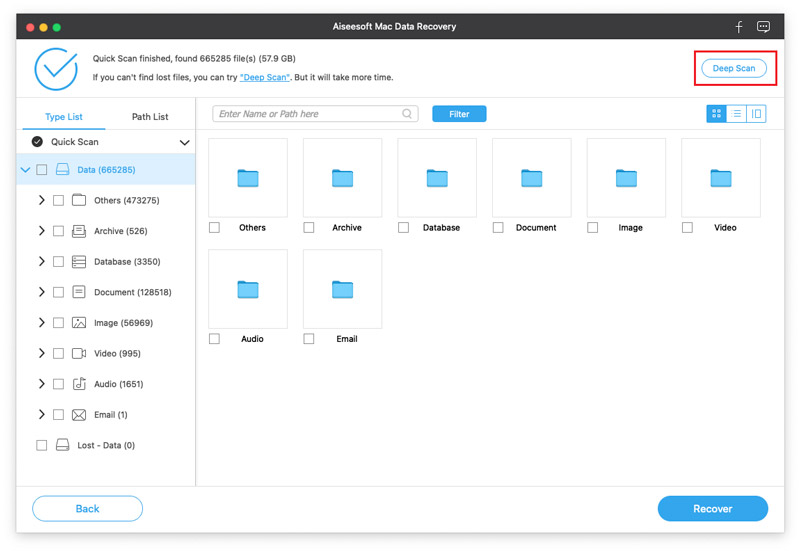
Step 3After scanning, all your data types will be listed. You can see basic data types, and click to view the data details. If you want to export the hidden files, you can click "Recover" to extract the hidden files to your Mac.
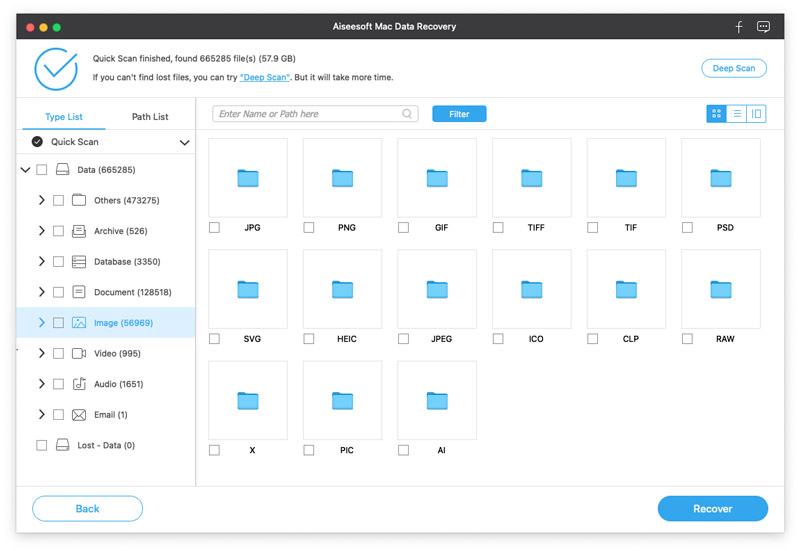
You can also select "Path List" to locate the hidden files.
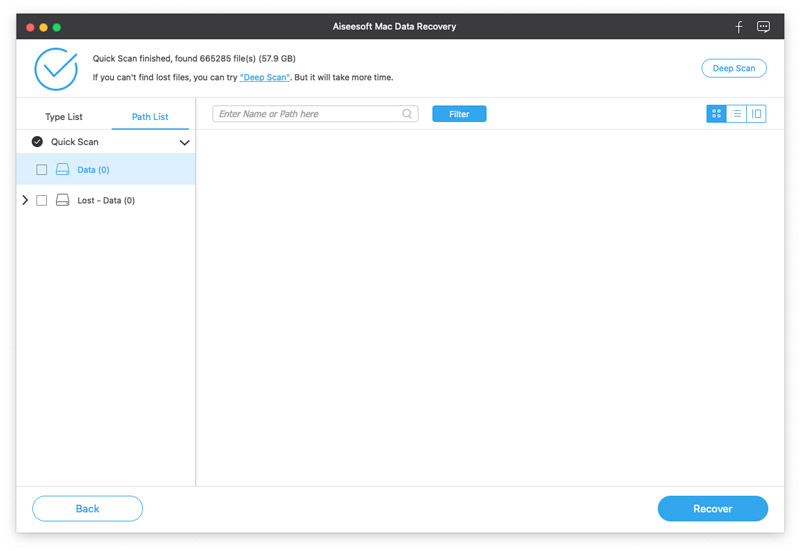
If you didn't check the hidden files out, or want more detailed files, you can click "Deep Scan" on the right top of the interface to scan all your data files including hidden files thoroughly and completely.
Don't miss: How to find hidden apps on iPhone
Conclusion
We've introduced you how to show hidden files on Mac. Aren't these 3 quick and useful ways helping you find the hidden files on Mac? You never need to worry about the damaged or loss data on your computer, because the professional Mac Data Recovery also enables you to manage and locate your hidden files. As long as you follow these instructions step by step, you are sure to see the hidden folders and files on your Mac easily.