The use of smartphones has really increased. Not only because of their great functions but also because they can be used to catch important moments and create unforgettable memories. Smartphones now have great resolution and high quality cameras that can be used to take quality pictures. Samsung phones are not left out of these features.
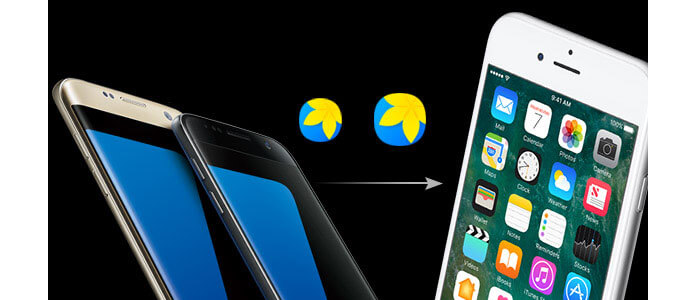
Do you have some photos on your Samsung Galaxy phone and want to share or transfer them to iPhones? You might think doing this is possible by just logging in to your Google account on the Samsung phone, then sync them to your Gmail account and from Gmail to your iPhone. Yes, this is a possible way. But here, I am going to teach you a new method which is quick and direct with just few clicks.
You will also like reading: Sync Android Phone Contacts to Google.
This simple and fast method can be achieved with small but powerful software called FoneCopy.FoneCopy is a PC tool that can be used to transfer files between smartphones such as Samsung Galaxy and iPhone. It is designed to transfer files with high-quality.
Don't miss: 2 Ways to Export iPhone Contacts to Gmail.
Download Aiseesoft FoneCopy and follow the following steps.
After downloading FoneCopy, install and run it on your PC.

Connect your devices that is, Samsung Galaxy phone and iPhone to your PC via USB.
Note that USB drivers for each device on your PC may be required.
This software supports almost Android and iPhone devices, so it can also help you transfer Blackberry contacts to iPhone XR, sync HTC photos to iPhone XS, etc.
Before connection can be established between your devices and FoneCopy, you have to Trust your devices by accepting a pop up message on them. Follow the instructions on the "Information" dialog box and click on the device's tab to display the steps.
For iPhones, unlock the screen if it is locked and tap Trust on your device's screen.
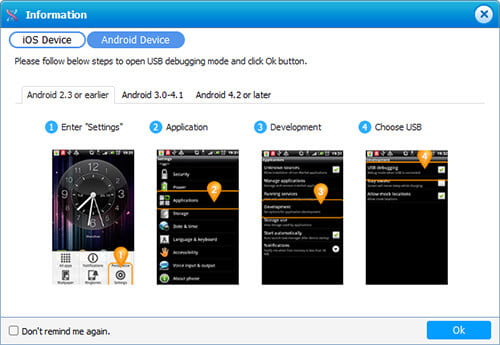
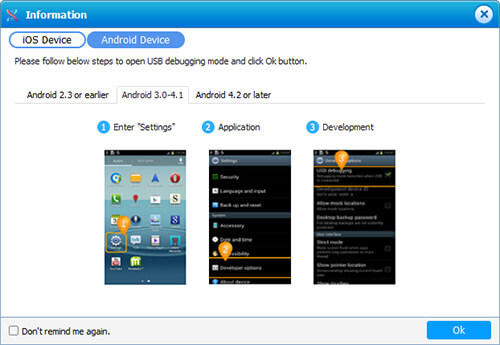
To allow a connection to be established between your android device e.g. Samsung Galaxy phone and your PC, enable "USB Debugging" on your android device. Without this done, FoneCopy cannot detect your android phone. To enable "USB Debugging" on Samsung Galaxy phones, click on the "Android Device" and on the android version tabs based on the android version of your devices. Follow the instructions as numbered in the images.
For Android version 2.3 or earlier:
For Android versions 3.0 – 4.1:
For Android version 4.2 or later(Android 15 Included):
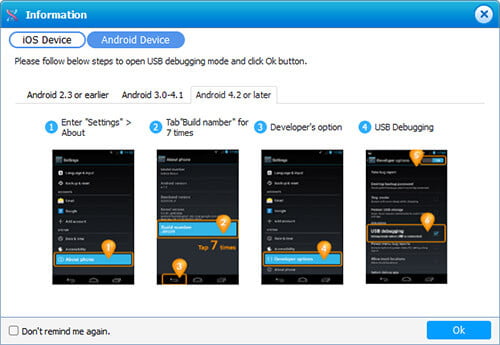
Then, click "Ok" to continue.
Now your devices will start connecting to your PC and the interface will look like this:
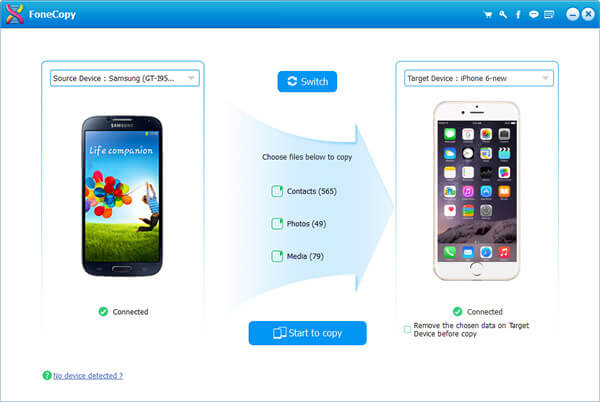
After the devices have been connected, tick "Photos" and click on "Start to copy".