iPhone Notes app enables you to create checklists, capture a quick thought, sketch ideas and so on. When you've got the Notes app on more than one Apple device, like iPhone, iPad, iPod or Mac, actually you can sync all your checklist, quick thought, sketch ideas, drawing and whatever on Notes from one Apple device to another. That means your note can be always with you wherever you are or whenever you need them. To sync iPhone notes to iPad, iPod or Mac, you can use iCloud to help you do this. In addition, if you are using Gmail or Exchange, you can also access your notes as well.
You will also like reading: Find and Recover Deleted Notes on iPhone.
iCloud enables you to keep all your notes up to data across all your Apple devices. As long as you're signed into with the same Apple ID, you can access and view all your iPhone notes from another iPhone, iPad or Mac.
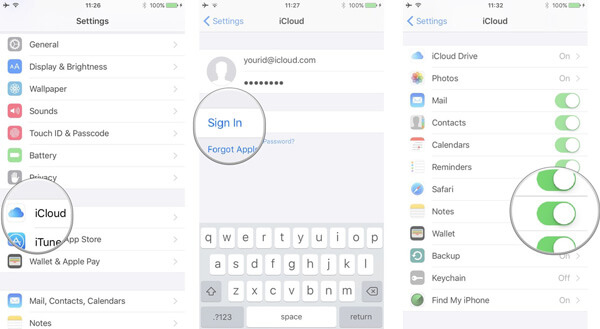
1 Launch the Settings app on your iPhone.
2 Tap [your name] > Tap iCloud. Enter your iCloud email and password and tap Sign In, if prompted.
3 Toggle on Notes. You will see iPhone notes from another Apple device as long as you've logged into the same Apple ID.
Other popular services also support iPhone notes sync, such as Google's Gmail or Microsoft's Exchange. You can navigate to your Mail account and turn on iPhone notes sync for Gmail or Exchange.
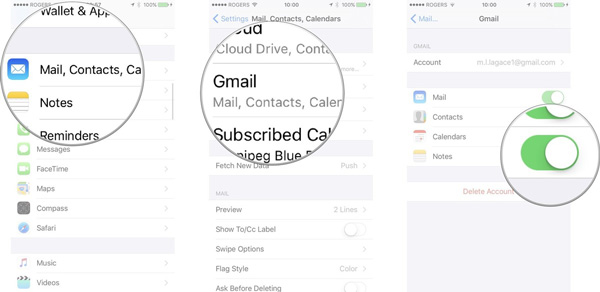
1 Launch the Settings app from your Home screen.
2 Tap Mail, Contacts, Calendars.
3 Tap on the account you want to enable (i.e. Gmail, Exchange, etc.).
4 Switch on notes sync in the list of services.
Notes can be stored locally on iPhone, or in online account like iCloud. When you have notes in various multiple devices, you can follow the simple guide below to switch account in notes.
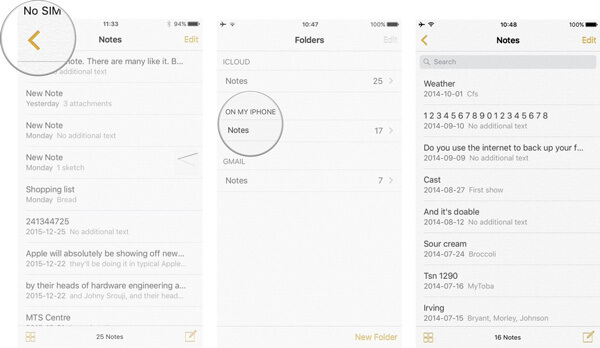
1 Launch the Notes app from the Home Screen of your iPhone.
2 Tap on the Backicon at the top right of the list view screen.
3 Tap Edit and then choose the notes that you want to switch to another account like Gmail or On My iphone.
In case you've lost some important iPhone notes and want to get the notes back. Then FoneLab - Best iPhone Data Recovery is highly recommended. This program is definitely the best iPhone notes recovery to retrieve the deleted or lost iPhone notes.
Step 1 Launch iPhone Notes Recovery
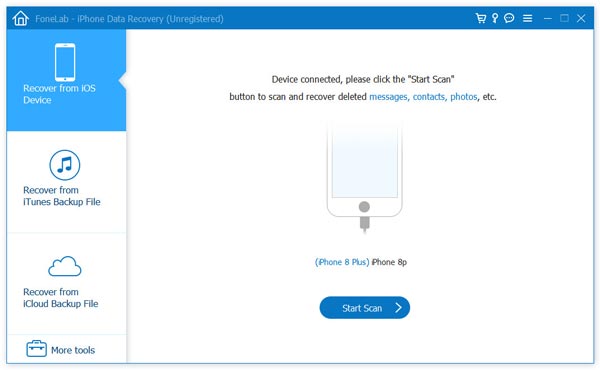
Download, install and open iPhone Data Recovery for recovering iPhone notes. Connect your iPhone to it with USB cable. Choose "Recover from iOS Device" mode.
Step 2 Scan iPhone data
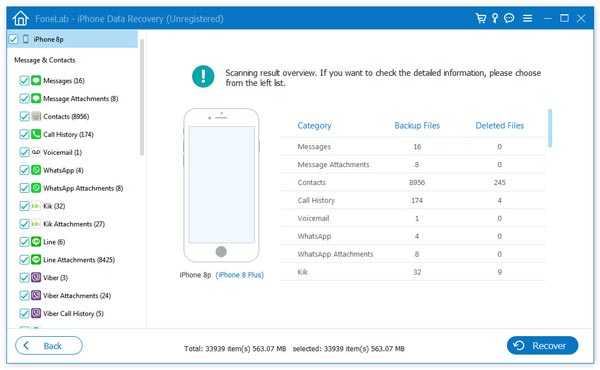
Click "Start Scan" to analyze all types of data on your iPhone. After scanning, you can see various files on list in categories on the left control.
Step 3 Find deleted iPhone notes
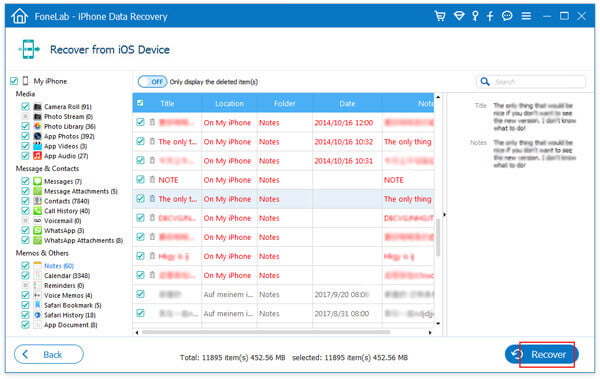
Click "Notes" option and you can check the existing and deleted notes from the preview window. Slide the "Only display the deleted item(s)" button to "On" and you can check all deleted/lost notes.
Step 4 Recover deleted iPhone notes
Choose the notes you want to recover and then click on "Recover" button to get iPhone notes recovery on your computer.