News: After iOS 11/12/13/14 update, every iPhone or iPad user can use the built-in document scanner within the Notes app to scan receipts, barcodes, photographs, documents and other paperwork.
What would you do if you want to keep a copy of important documents, receipts, photos and other files? Most people used to take photos and save them into the related albums. But it is the tedious work for people who have lots of documents and photographs need to be backed up. Some people prefer to use document scanner apps to scan with iPhone. But if you are tired of installing external applications and not so satisfied with those documents scanners, then you can try to scan with iPhone Notes app directly. Besides scanning iPhone documents, the hidden document scanner inside Notes allows users to edit and share scanned documents freely. So there is no need to install third party document scanner apps, just use Notes app to scan documents with iPhone.
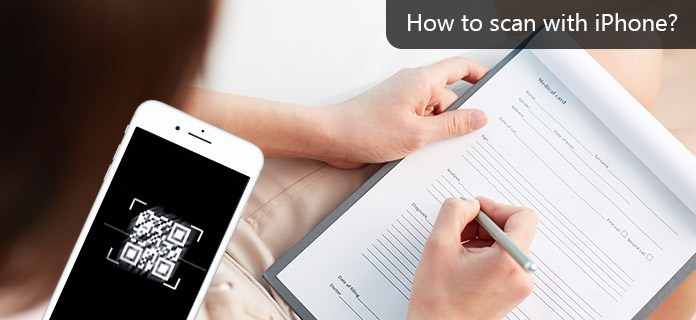
Notes app is a built-in app on iPhone. So many people just neglect it and choose other alternative ones. But it can do many jobs, including scanning with iPhone about all kinds of documents. Notes will detect the edges of your documents and then scan iPhone documents as flat as your original paperwork. Moreover, you can scan with iPhone after iOS 11/12/13/14 update of multiple pages into a single document. To be more specific, if you have a ten-page document need to be scanned, you can scan each page and then save into Notes as one document. It means you can scan paperwork into digital files with iPhone Notes app in a smart way.
Moreover, Notes app allows users to manage scanned iPhone documents with many choices. For instance, you can save the scanned files as PDF, share it to someone or use markup feature to annotate it in free way. In a word, you can scan with iPhone iOS 11/12/13/14 to turn paperwork into PDFs for free. And you can find more new features about Notes app since the latest iOS 13/14 update.
The iPhone Notes app can work as your versatile document scanner to scan, mark up, convert and share all documents. Scanning documents is a hot topic in the Apple forums. And in this part, you can learn how to scan documents with an iPhone step by step.
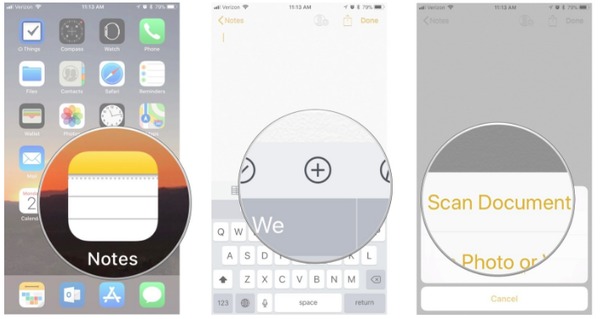
Step 1 Activate "Scan Document" in Notes app
Launch Notes app on your iPhone. Create a new note in iPhone as usual. Click the "More" icon and select "Scan Document", it looks like the plus in the bottom. Now your built-in camera will start working automatically. If the camera does not work, you can tap "Shutter" button or the volume button to start scanning manually.
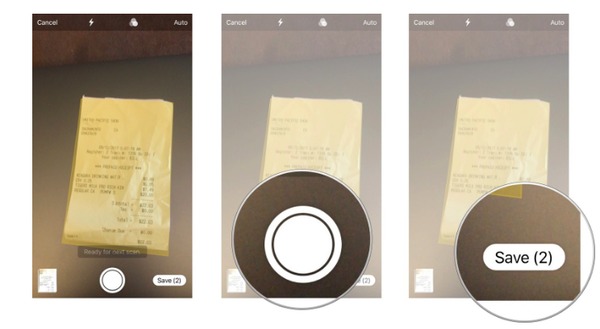
Step 2 Scan documents with an iPhone
Place documents you want to scan in order. You can choose "Drag near corners to adjust", which can help you adjust the edges of the scanning files. For people who need to scan multiple documents with iPhone, just click "Keep Scan" and line up the camera again to keep scanning with iPhone camera. Finally, hit "Save" button in the lower right corner to save scanned pages to iPhone.
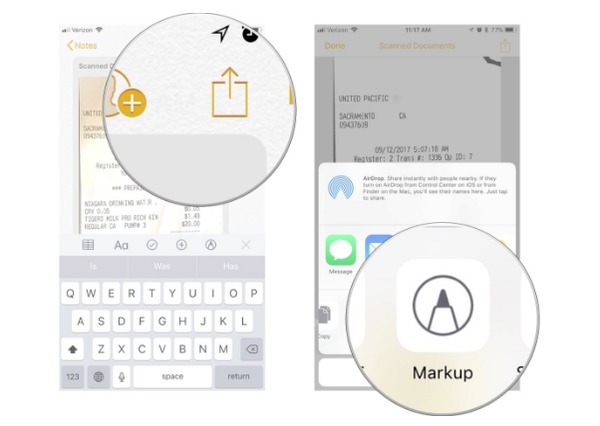
Mark up A Scanned Document
To mark up a scanned document with iPhone, you can tap the "Share" button in the top right corner, and then choose "Markup" icon to customize scanned documents. Press "Done" to save all your changes.
Convert Scanned Documents to PDF
Tap "Share" to pick up "Create PDF" button. Press "Share" in the lower left corner and select any application to share with.
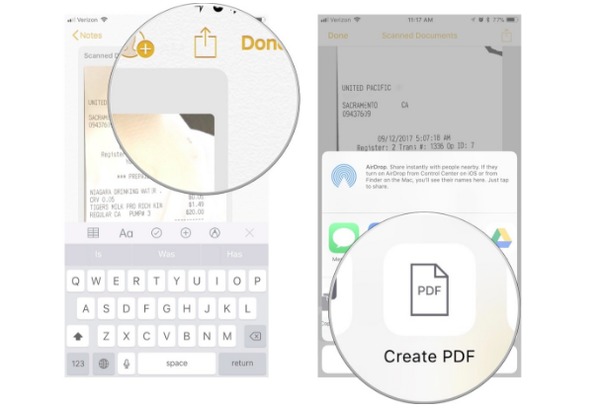
Share scanned documents with iPhone to other apps
After finishing documents scanning with iPhone, hit "Share" button in the top right corner. Select an app you want to share scanned iPhone documents and then complete the whole process.
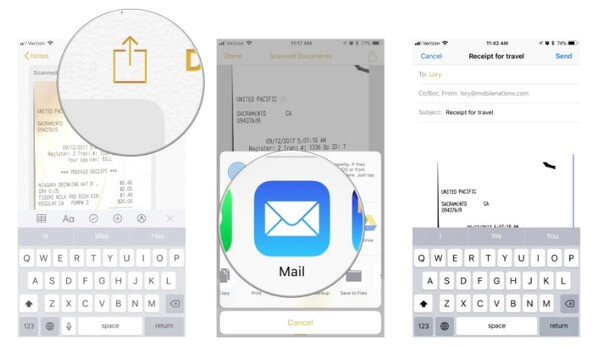
You can use Notes app to scan photographs with iPhone as well. No matter you upload images from photo library or take the new photos, you can scan photos with iPhone camera without problem.
Step 1 Upload photographs from photo library to Notes app
Open Notes app on iPhone. Create a new note. Click the "More" button that looks like the plus icon. Tap "Photo Library" to scan existing photos. Select all photos and click "Done" to add photo library into Notes with iPhone.
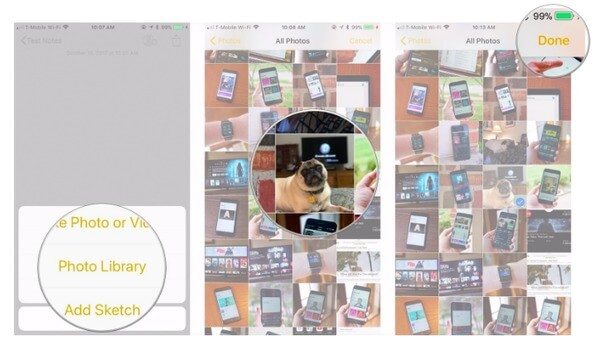
Step 2 Scan and take new photographs with iPhone
Press "Take Photo or Video" after choosing "Notes" and "More" to capture photographs to scan with. Tap "Capture" button to shoot photos. Choose "Retake" to take more photos. Select "Use Photo" in the lower right corner if you are satisfied with the photo you have taken.
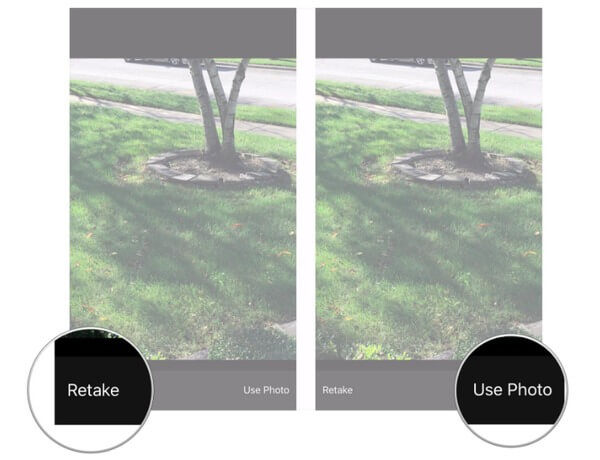
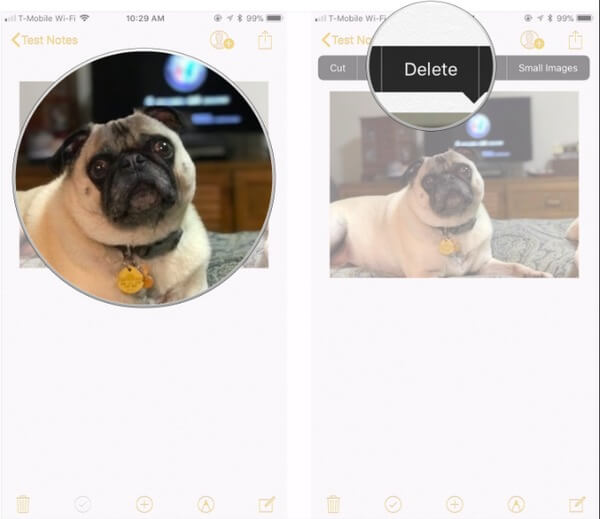
If you insert a wrong photo, you can also delete the file inside Notes application. Launch Notes app, open the scanned iPhone note that contained the photo you want to delete. Long press that photograph, and then select "Delete" button. Your original photos will not be removed from your library.
After scanning documents and photographs with iPhone Notes, you can organize all your notes by creating a new folder. All iPhone models are supported, including iPhone 16/15/14/13/12/11/XS/XR/X/8/7/SE/6/5/4 and more. The only premise is that you need to upgrade it to iOS 12/13/14. Moreover, you can try methods above to scan barcodes, receipts, QR codes and others with iPhone Notes too. If you still have anything hard about scanning with iPhone Notes, feel free to leave your messages below.