Summary: Want to record your Mac screen but don't know how? This post will show you how to record video and audio on Mac with QuickTime. Moreover, a great screen recorder will be recommended to help you record a video with audio on both Mac and Windows PC.
"I want to capture both what's happening on my Mac screen and the audio being played. I tried the QuickTime but only captured a video with sound. I am using an old MacBook with Mac OS El Capitan. How to record a video with audio with QuickTime? Or is there any good video recorder to capture both on my Mac? Any help?"
QuickTime is one of the most popular media playing software, which is widely used by Mac users. It also can work as a powerful screen recording tool to help you record a movie or audio on Mac. This built-in QuickTime Player X has the capability to record whatever displayed on the screen. But for many Mac users, they still don't know how to make QuickTime screen audio recording. Are you one of them?
If you don't know how to use QuickTime to capture screen on Mac, or only get a video without sound after recording, you are at the right place. This post will tell you the detailed steps of QuickTime screen audio recording.
QuickTime enables you to record the whole Mac screen or customized part with ease. Moreover, it can help you capture a video of yourself with FaceTime HD Camera. Now you can check the following parts to record your Mac screen with QuickTime.
Step 1 Launch QuickTime on your Mac. Click File on the menu bar and then select New Screen Recording from the drop-down list. After that, the Screen Recording window will appear.
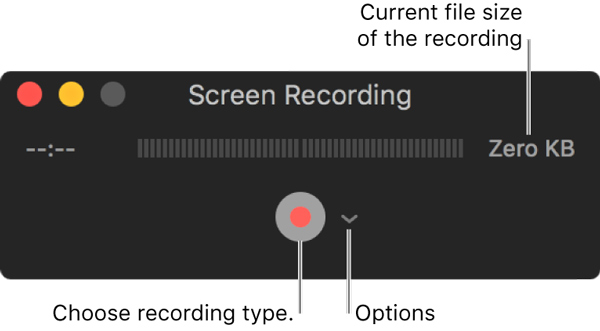
Step 2 Before the QuickTime screen audio recording, you need to set the recording settings. To do that, you can click the arrow next to the Record button. Then you can choose camera or iOS device, microphone, and recording quality, and so on.
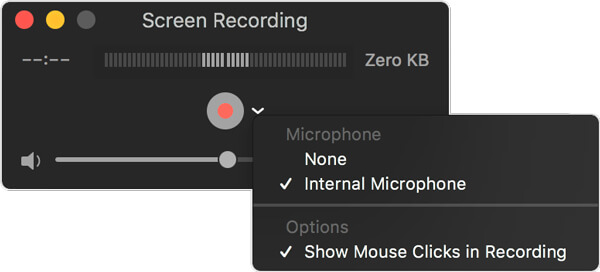
Step 3 Click Record button to start capturing video on Mac. You can click anywhere on the screen to capture the whole Mac screen. Also, you can drag to select an area to record. Then click the Start Recording button to begin the QuickTime screen audio recording.
Step 4 You can click on grey Stop recording button to end the session when the recording is over. Or you can press the Command + Control + Esc to stop the recording process.

When the QuickTime screen audio recording is finished, the captured video will be automatically saved and opened. You can view, edit and share it with ease.
If QuickTime player crashes and stops working before saving the recording, you had better recover the unsaved recording right now.
As you can see from above, QuickTime enables you to record video with FaceTime HD Camera. That means you can handily capture a video of yourself with the webcam. Check the following guide to get detailed steps.
Step 1 Launch QuickTime on Mac and click File on the menu bar. Then select the New Movie Recording option.

Step 2 Click the same arrow next to the Record button. This time, you should choose the FaceTime HD Camera. Then you can set microphone, recording quality and more.
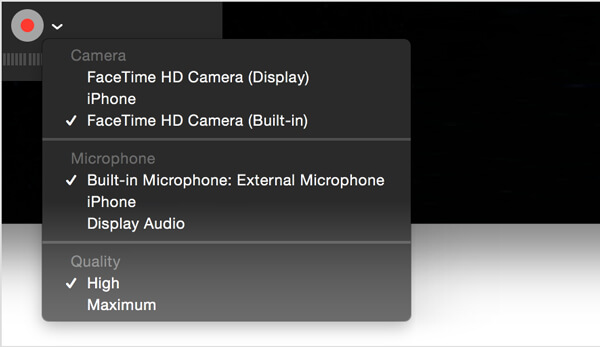
Step 3 Click Record button to start the QuickTime recording. Click the grey Stop button to end the process.
QuickTime also allows you to capture audio only if the sound played on Mac is all your need. You can choose the built-in microphone, external microphone, or other Core Audio-compliant audio device to make the QuickTime audio recording.
Step 1 Open QuickTime and click File on the menu bar. At this time, New Audio Recording is the option you need to pick.
Step 2 Click the arrow next to the Record button to set the sound recording settings. Here you can select microphone and recording quality.
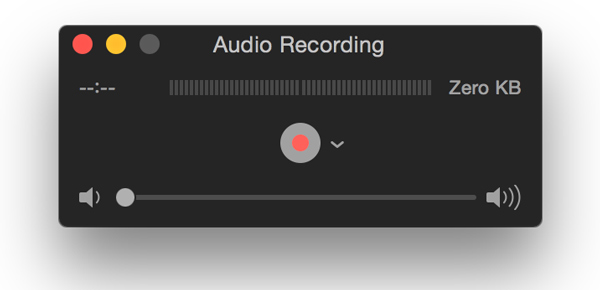
Step 3 Click Record to begin the QuickTime audio recording process. When the recording is finish, just click the same button again to stop it.
With the methods above, you can handily record video and audio on Mac with the built-in QuickTime Player. But you have to admit that, while the QuickTime screen audio recording, there are still a lot of inconvenient. To help you easily capture anything displayed on Mac, here we sincerely introduce you with the professional Mac Screen Recorder.
Step 1 Launch Mac Screen Recorder
Double click the download button above to free download, install and run this powerful screen recording software on your Mac.

Step 2 Set recording area
Click the third button to customize the Mac screen recording area. You can capture full screen, a fixed region or a custom region according to your need.
Step 3 Adjust audio settings
This Mac screen audio recording software enables you to record audio from System sound or microphone. You can choose either of them or both.
Step 4 Record screen audio on Mac
Click REC button to start to capture screen and audio on your Mac. Click the same button to stop when the recording is finished. The captured video or audio file will be saved in any popular format you need.

We mainly talked about the QuickTime screen audio recording in this page. You can find detailed steps to capture video and sound with QuickTime Player. What's more, we recommend an easy-to-use QuickTime alternative to help you easily get the capturing job done. If you still have any question, feel free to leave us a message.