Recently, my favorite friend, Anna who is an English teacher talked about her problem with me. She said: "I want to record an online English show which can't be downloaded from the website, could you have some ways to help me record it?" Or, someone said, "I need to capture my Skype chats and how to record my desktop?" Maybe, some of you encountered the similar problems. Here, we will introduce easy and professional ways to help you record desktop screen on Mac OS X and Windows.

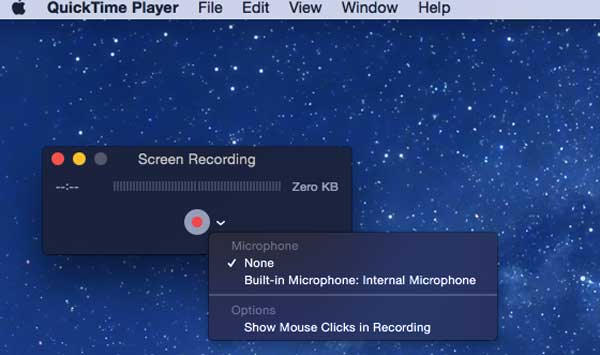
When you want to record desktop screen on Mac, you will be happy because the Mac OS X offers a convenient, built-in screen-recording utility. It's one of useful functions hidden in QuickTime, which is not just the simple media player. So, you can capture what is happening on your Mac with free Desktop Recorder.
To record your Mac's screen, you can follow the steps below:
Step 1Locate your QuickTime application on your Mac and open it.
Step 2 Click the File menu on the menu bar, select "New Screen Recording", and then you can click the little menu to the right of the "Record" button and choose whether you want to capture audio from your microphone in the video or not. Click the "Record" button to start when you're ready.

Step 3 QuickTime will minimize itself to a small icon on the right side of your menu bar and start recording. Click "Stop" when you're done, and you'll be able to preview and save your video. Apart from recording, QuickTime can also edit the video, trim out any unnecessary bits.
For mroe ways to record screen on Mac, you can refer to this post: How to record Mac screen.
Regarding the Desktop Recorder on Windows, you need to know a Screen Recorder for Windows. With this Desktop Recorder, you can capture any video or audio on your Windows 10/8/7/Vista PC and save them with high quality.
You can use this Desktop Recording Software to record online movies and radio, make video tutorials, record game, etc.
Now, we will introduce how to use it to record desktop screen on Windows step by step:
Step 1 Download and install this Desktop Recorder
After downloading this desktop recorder software on your computer, you can run it.
Step 2 Select the recording area on your Windows
Before recording desktop videos, games, Skype chats, online videos or some meeting videos with this Desktop Screen Recorder, you need to adjust the recording area first. This program allows you to choose the full screen or customize the recording area based on your demand.
Step 3 Adjust the audio
If you want to record a video meeting or the Skype chats, you should select both System Sound and the Microphone. In this step, you can just click the System Sound and Microphone to ensure the checkmarks appear. However, if you are going to record the sound of your videos, you need to turn off the Microphone and open the System Sound. Because the noise around will reduce the audio quality of your recordings.
Step 4Record the desktop screen
After completing the settings of recording area and audio, you need to open the window which you need to record. For instance, when you want to record the the video, you should open the specific video and choose the recording video area first. And then you can click "REC" on the right side of the interface to start recording.

The process of recording desktop is very easy. You can also follow the steps to record Skype video calls.
After finishing this screen recording process with this desktop recorder, you can save the recorded video to your computer and enjoy it with MP4/WMV. What's more, if you want to view the recorded video with other formats, you can convert them to other video/audio formats like MOV, MP3, AAC, etc with the Free Video Converter.
Anyway, now you have known about how to record the desktop screen which you want to capture. You can choose the proper method to record desktop on Mac and Windows.
You can learn the steps from the video below:

