Apart from streaming photos between two iOS devices, iCloud can also help you to back up photos to iCloud, as long as you use the one same iCloud account on the device. In this article, we would like to show you how to effectively backup photos to iCloud.

With no device limitation, iCloud allows you to make any backup from different iOS device with the same Apple ID. Though it allows you back up various data like contacts, notes, videos, device settings, app data, ringtones, mails, iCloud only offers 5 GB of free storage for each Apple account. You can purchase more space if you want more storage space.
Purchase more iCloud storage from iPhone
◆ 50GB: $ 0.99 a month
◆ 200GB: $ 2.99 a month
◆ 1TB: $ 9.99 a month
It's easy to backup documents from iCloud to your iPhone and iPad. Here is what you need to do when you choose to backup your photos to iCloud automatically from your iPhone or iPad.
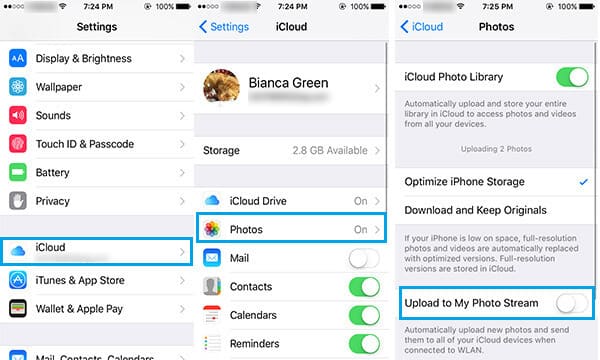
Step 1 All you need to do is tap on "Settings" > "iCloud".
Step 2Go to "Photos" and turn on "Up to My Photo Stream" if it is turned off.
Step 3All the photos that you take will be automatically uploaded iCloud when your iPhone is connected to WLAN.
Not only photos, you could also backup notes on iPhone to iCloud. Check this here: How to backup iPhone notes to icloud.
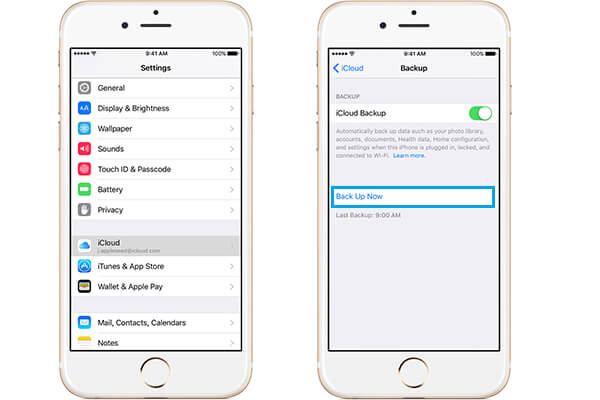
Step 1Connect your iPhone to WLAN or turn on Cellular Data.
Step 2Tap on "Settings" app, scroll the screen and choose "iCloud".
Step 3For iOS 8 and later, enter iCloud tab, and scroll the screen and tap "Back Up Now". For iOS 7, go to "Storage & Backup" and then choose "Backup Up Now".
The only hiccup in this is - you cannot choose what to back up from your phone. Let alone choosing which photos you want to backup, you cannot even choose if you want to back up your photos and not your contact list or some other document.
Want to back up photos to iCloud from your Mac? Your Mac can be connected to the iCloud account easily. Backing up your Mac in a few simple steps as mentioned below:
Step 1Go to "System Preferences" on your mac, you can find different system options. Find iCloud icon and click it.
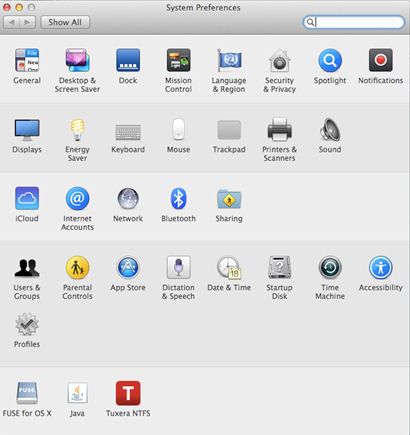
Step 2Then iCloud control panel for Mac will appear. If you haven't already signed in to your iCloud account, log into it now.
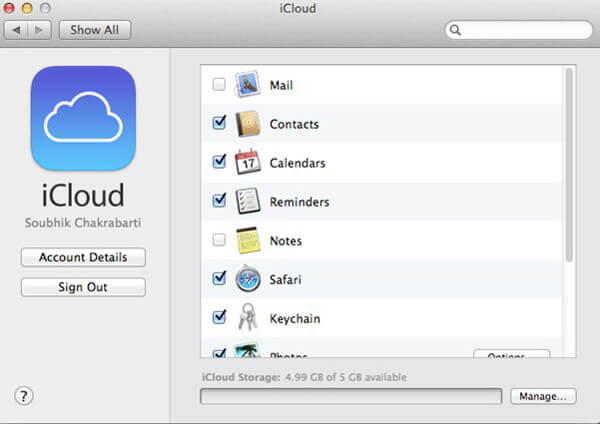
Step 3Choose the files you want to backup. By default, all the data items are automatically ticked in for backup.
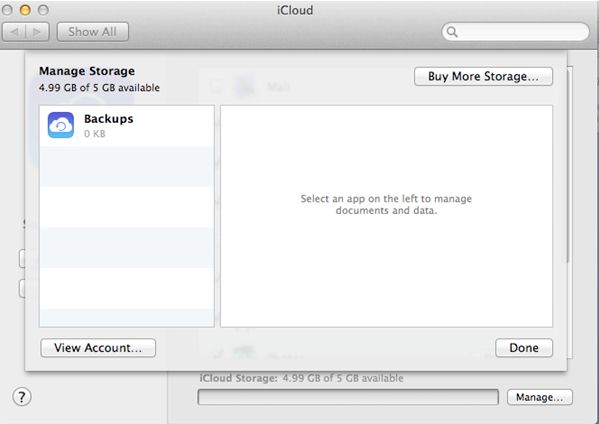
Notes: However, remember that iCloud only offers 5 GB free storage space. You can click "Manage" > "Buy More Storage" to purchase more storage.
You may want to get photos off iCloud. Then we'd like to recommend you a reputable third-party iOS Photos Recovery, FoneLab to help you retrieve photos from iCloud backup.
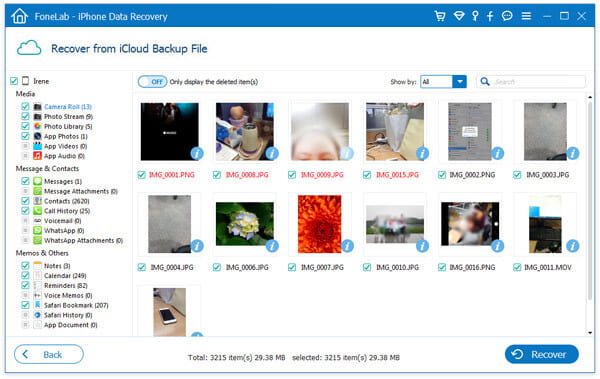
Step 1Log into iCloud with your Apple ID and password.
Step 2Choose the proper iCloud backup file.
Step 3View and choose the target photos to retrieve.
In this article, we mainly discuss how to back up photos to iCloud from iOS device and from Mac.